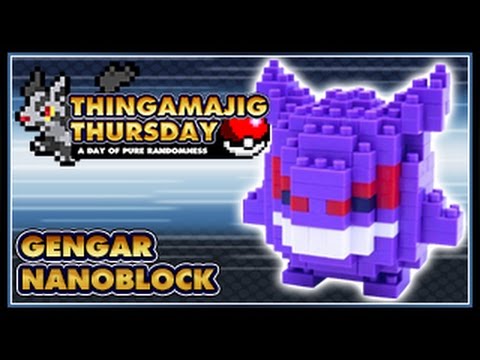
Gengar Nanoblock NBPM-007 is Kawada’s standard 150-piece Pokémon Gengar building kit. Kawada lists a completed size of 52 × 52 × 48 mm—about 2 inches at its widest and tallest—and a recommended age of 12 and up for the Japanese release. Packaging and documented builds identify it as difficulty level 2.
It is a reasonable choice for a patient first-time Nanoblock builder, but “level 2” does not mean every stage is effortless. The loose opening layers, densely packed purple diagrams and small ear connections account for most of the documented frustration. The finished model is compact, recognizable and relatively solid once those layers are locked together.
This is an independent fan guide. Nanoblock is a Kawada brand, and Pokémon is credited to Pokémon, Nintendo, Creatures and GAME FREAK. This website is not an official Kawada or Pokémon resource.
In this guide:
Which Gengar model is this?
“Gengar Nanoblock” no longer describes only one product. The standard NBPM-007 kit still dominates search results, but Kawada has also released a larger Mega Gengar RS building set and a preassembled Gengar n-fig. Confirm the model number before buying instructions, replacement parts or a secondhand set.
| Product | Model | Format | Pieces | Completed size (W × H × D) | Best fit |
|---|---|---|---|---|---|
| Gengar | NBPM-007 | Standard Nanoblock building kit | 150 | 52 × 52 × 48 mm | A small, traditional pixel-style Gengar build |
| Mega Gengar RS | NBPM_R10 | Larger RS-series building kit using angled and flat elements | 530 | 124 × 71 × 89 mm | Builders wanting a larger, more detailed Mega Gengar |
| Gengar n-fig | NFG-49 | Preassembled figure with removable keychain | Not a building kit | 52 × 51 × 48 mm | Collectors who want the block-style appearance without assembly |
The nearly identical dimensions of NBPM-007 and NFG-49 make photographs alone a poor identification method. Look for NBPM-007 and a stated count of 150 pieces if you want the buildable model covered here. Mega Gengar RS is a separate character form and a substantially larger project.
Verified NBPM-007 specifications
The following values come from Kawada’s official NBPM-007 catalog page unless otherwise noted. The date and age guidance are Japanese specifications; regional packaging and distributor labeling may differ.
| Official product name | Pokémon: Gengar (rendered “GANGAR” on Kawada’s English page) |
|---|---|
| Model number | NBPM-007, also printed as NBPM_007 |
| Brand and manufacturer | Nanoblock by Kawada Co., Ltd. |
| Series | Pokémon character collection |
| Piece count | 150 |
| Difficulty | Level 2 of 5 on documented packaging; Kawada’s current web page leaves the difficulty value blank |
| Recommended age | 12 years and up for the Japanese release |
| Completed size | 52 × 52 × 48 mm (W × H × D) |
| Package size | 105 × 180 × 13 mm (W × H × D) |
| Japan release date | June 28, 2014 |
| Instructions | Illustrated single-sheet manual; an official PDF is available from Kawada |
| Blind-box status | No. NBPM-007 is sold as an identified Gengar kit. |
| Movable features | None documented for NBPM-007 |
| Extra blocks | The official instruction sheet states that extra blocks are included |
The completed model occupies only about 2 inches of shelf space, but the small footprint should not be confused with a conventional large-brick build. Its facial details, back spikes and feet depend on very small elements and careful one-stud offsets.
Is it a good first set?
NBPM-007 suits collectors who want a short, compact Pokémon project and do not mind working slowly with tiny pieces. Its rounded body becomes more secure as the layers close, and several documented builders described the finished structure as solid. The design also captures Gengar’s broad grin and stepped back spikes without requiring hundreds of angled elements.
It is less suitable for a young child who still struggles with tiny parts, anyone with limited fine-motor control, or a builder expecting conventional block-by-block instructions. The diagrams combine multiple vertical layers in each numbered stage, so success depends more on spatial reading and alignment than the 150-piece count suggests.
Choose Mega Gengar RS NBPM_R10 instead if display size and added shaping matter more than a quick build. Choose the Gengar n-fig NFG-49 if you want a similarly sized figure and removable keychain but do not want to assemble it.
Use the official instructions
This guide is a practical companion to the manufacturer’s official instructions. It does not replace the official diagrams.
Open or download the official Kawada NBPM-007 instruction sheet. It is a one-page PDF with eight numbered stages. The seventh stage tells the builder to turn the body over, and the eighth adds the feet before the model is returned upright.
The manual’s parts column shows what each stage needs, while the exploded diagrams show several layers at once. Read both together. A purple piece that appears to float above another layer is usually indicating the next vertical connection, not a second independent subassembly.
A Gengar instruction image also circulates on Pinterest, but its ownership and republication history are unclear. Kawada’s PDF is the safer and more authoritative version to save or print.
Prepare the parts and workspace
Gengar’s palette is simple, but that creates a different problem: most of the body pieces are purple. Sorting only by color leaves too many similar shapes in one pile. Separate purple blocks by footprint—single-stud, long narrow, corner or L-shaped, and wider plates—then make smaller groups for the white mouth pieces, red eyes and black pupils.
- Work over a shallow tray, rimmed mat or light-colored cloth so dropped pieces do not bounce onto the floor.
- Keep the official PDF enlarged on a screen or print it at a comfortable size. Several documented builders found the layered diagrams difficult to read at package-sheet scale.
- Lay out only the pieces required for the current numbered stage. This turns the parts column into a check: unexplained pieces in the stage pile usually mean that a connection has been missed.
- Orient the model the same way as the diagram before adding a layer. Gengar is broadly symmetrical, which makes a one-stud left-right error easy to overlook.
- Keep leftovers aside until the model is complete. Kawada explicitly notes that extra blocks are included.
Are tweezers or a building pad necessary?
Neither is required, but a Nanoblock building pad is the more useful accessory for this model. The official sheet recommends Kawada’s NB-019 or NB-020 pad, and builders in a focused Reddit discussion independently suggested a pad or plate for Gengar’s loose beginning.
Tweezers can help select small parts from a pile. They are less useful when a piece must be pressed into the underside of the body because there may be no exposed edge to grip. Fingertip pressure and a correctly supported model are often more effective at that stage.
Where the build needs attention
The official sheet remains the assembly sequence. The notes below explain what to watch for rather than replacing its diagrams or prescribing every block position.
Why the opening layers feel unstable
Stage 1 forms the lower body, mouth and projecting sides from several separate-looking rows. Until those rows overlap, they can shift under finger pressure. This is the point at which a building pad helps most: it holds the first layer square while the next layer creates stronger cross-connections.
PokeCollection’s recorded first build shows the creator hesitating over how to make the initial layer solid. A later Reddit post describes the same problem more strongly, while noting that the build became smoother after the base was established. Those are individual experiences, but they identify the same structural transition.
Count the mouth and arm offsets
The white mouth details use small individual blocks before later purple layers secure them. Lady KrimZen’s tutorial shows these pieces remaining loose temporarily, so avoid squeezing the face from both sides while that area is incomplete.
The arms also emerge early from the body. In the same tutorial, one arm was initially left too short and had to be corrected after the asymmetry became visible. Compare the left and right projections before covering their connection points with another layer; repairing the error immediately is easier than opening the body later.
Use the colored guide blocks
Some blocks in Kawada’s diagrams appear in faded or contrasting colors to clarify where a new layer sits. Those visual guides matter when several purple courses are shown together. Before pressing anything firmly, locate one unmistakable feature—the mouth edge, eye position or rear spike—and count studs outward from it.
The model’s upper body becomes hollow as the shell closes. That empty center is intentional in the documented builds. Do not fill it simply because unused purple blocks remain; those blocks may be spares.
Support the head before adding ears
The middle of the upper shell can flex before the top layer bridges it. Apply pressure directly above supported studs rather than pushing down over the opening. Once the top courses are connected, the shell becomes much more rigid.
The ears attach near the outer edges. Shy Gal’s Building Blog reported repeatedly knocking them out of alignment while installing them. Hold the head below the ear connection, press each ear vertically, and avoid using the opposite ear as a handle.
Turn it over for the underside
The official seventh stage turns the body upside down to close part of the underside. Place the model on a folded microfiber cloth or support it in your palm so the ears and back spikes are not carrying its weight.
Before returning it upright, sight along the underside rows and make sure each block is fully seated. The two feet are added afterward. Their placement determines whether the finished model rests evenly, so compare both sides before applying final pressure.
Common problems and fixes
| Problem | Likely cause | Practical response |
|---|---|---|
| The first layer keeps moving | The separate rows have not yet been locked by overlapping courses | Align the layer on a building pad or flat plate. Press the next course one connection at a time rather than lifting the whole base. |
| The mouth pieces feel loose | Small white elements receive more support from later layers | Handle the model from its purple lower body until the face is bridged. Do not assume temporary movement means the piece is misplaced. |
| One arm is shorter | A purple side piece is offset by one stud or installed in the wrong course | Compare both silhouettes before advancing. Reopen only the newest layer and correct the projection while the connection remains accessible. |
| The eyes look uneven | A red or black element, or the purple frame around it, is shifted | Check the eye layer against the mouth centerline. Recount studs from the middle instead of judging only from the outer edge. |
| The upper head flexes | The hollow shell has not yet been bridged by its top courses | Support the walls from below and press only over connected studs. Reassess after the closing layer is attached. |
| An ear keeps coming off | Pressure is being transferred through the narrow edge connection | Brace the head immediately below the ear. Install one ear without gripping or leaning on the other. |
| The model rocks when finished | One foot may be offset or an underside block may not be fully seated | Compare the two feet from the front and bottom. Correct their placement before pressing harder on the body. |
| Blocks remain after completion | Kawada includes extra blocks | Compare the finished model with the last official diagram. If every feature and connection is present, store the leftovers as spares. |
| A required block appears to be missing | The part may be in another bag, under the instruction sheet or among the spares; a genuine shortage is also possible | Search the tray and packaging, then inventory that stage again. For a confirmed shortage, contact the seller or regional distributor and provide the model number, proof of purchase and a clear image of the required shape. |
How long does it take?
There is not enough controlled evidence for a trustworthy average build time. Lady KrimZen reported approximately 42 minutes for her recorded build and suggested it would have been shorter without commentary. That was one experienced creator’s session, included mistakes and was recorded late at night, so it should be treated as a documented example rather than a promise.
PokeCollection’s video uses editing and time-lapse, while Adam’s Brick Channel published a review rather than an uninterrupted timing test. A first-time builder should leave the session open-ended, especially if the instruction sheet must be enlarged or the pieces have not been sorted.
A useful stopping point is after a complete numbered stage, not halfway through one of its stacked layers. Photograph the model before taking a break so its orientation is easy to restore.
Buying and identification checks
Kawada still maintains an official NBPM-007 catalog page and instruction download, but U.S. stock, prices and seller status can change. Search by NBPM-007 rather than the character name alone, and verify the following before ordering:
- The listing identifies Kawada or Nanoblock and shows model number NBPM-007.
- The package states 150 pieces and depicts standard Gengar, not Mega Gengar.
- The package carries the Pokémon-related copyright credit rather than presenting the item as an unlicensed “Gengar-style” micro-block set.
- The seller shows the actual package or clearly identifies the regional packaging being supplied.
- A used kit includes the instruction sheet or is explicitly sold as incomplete. The official PDF can replace a lost manual, but it cannot replace missing blocks.
- The return policy covers incomplete or incorrectly described building sets.
A different piece count is a reason to pause. Third-party products using “nano,” “micro” or “diamond” in their descriptions may represent an unrelated block system. Likewise, a listing for NFG-49 is offering a finished keychain figure, not 150 loose blocks.
What to do about missing parts
First separate genuine missing parts from expected leftovers. The official sheet confirms that extras are included, but it does not promise a spare of every shape. Inventory only the numbered stage where the shortage becomes apparent.
For a new U.S. purchase, the retailer or regional distributor is the practical first contact. Kawada’s Japanese support pages state that their domestic after-sales form is limited to Japan, while the English Nanoblock site directs overseas customers to regional partners. Save the package, receipt and bags until the model is finished.
Video walkthroughs
Lady KrimZen: complete narrated tutorial
Lady KrimZen’s tutorial is the most detailed of the supplied videos. It shows the model developing layer by layer and documents several correctable problems: unstable mouth pieces, a short arm caused by placement, a misread overlap near the head and the awkward underside connections. Use it beside the official PDF, not in place of the PDF.
Video by Lady KrimZen. Embedded from the creator’s original YouTube upload.
PokeCollection: a first-time build
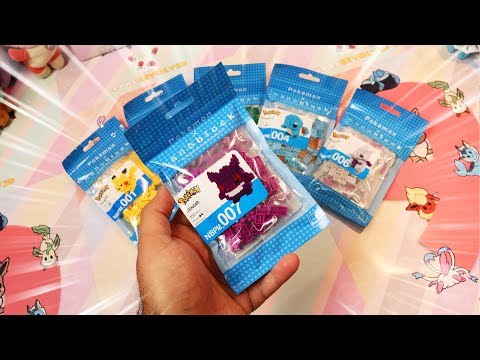
PokeCollection’s video is useful for beginners because the creator opens the kit without prior experience of this particular model. The video shows the parts bags, the single-sheet manual and the uncertainty that extra blocks and a deliberately hollow interior can create.
Video by PokeCollection. Embedded from the creator’s original YouTube upload.
Adam’s Brick Channel: finished-model review
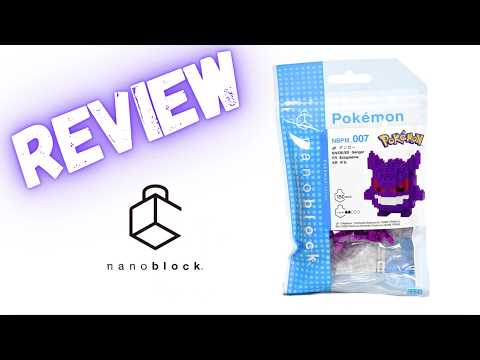
Adam’s Brick Channel focuses on the completed figure and instruction format. The close views make the scale of individual pieces clear, while the review explains why diagrams containing several stacked layers can be more demanding than the level-2 label suggests.
Video by Adam’s Brick Channel. Embedded from the creator’s original YouTube upload.
Gengar Nanoblock FAQ
What is the Gengar Nanoblock model number?
The standard 150-piece Gengar building kit is NBPM-007, sometimes formatted as NBPM_007. Mega Gengar RS is NBPM_R10, while the preassembled Gengar n-fig is NFG-49.
How many pieces does NBPM-007 contain?
Kawada lists 150 pieces. The official instruction sheet also states that extra blocks are included, so unused pieces do not automatically indicate an assembly error.
Where can I download the Gengar Nanoblock instructions?
Use Kawada’s official NBPM-007 PDF. It is more authoritative than instruction images copied to Pinterest, marketplace listings or document-upload sites.
Is Gengar Nanoblock hard to build?
Packaging shown in documented builds rates it level 2 of 5. The piece count is modest, but the unsupported first layer and multi-layer diagrams can still challenge a beginner. A pad and stage-by-stage parts layout reduce the main difficulties.
Is NBPM-007 a blind box?
No. It is sold as an identified Gengar kit. A sealed listing should clearly show Gengar and the NBPM-007 model number.
Does the kit include a display base?
The official NBPM-007 catalog and current official instruction sheet do not list a separate display base as part of the set. The model’s own feet support it. A Nanoblock pad can assist during assembly, but it is a separate accessory.
Why is the center of the model hollow?
The documented builds and official diagrams form the upper body as a shell rather than a completely filled block. Do not use all remaining purple pieces to fill the interior; Kawada includes extras.
Is Mega Gengar RS an updated version of NBPM-007?
It is better treated as a separate alternative. NBPM_R10 represents Mega Gengar, contains 530 pieces and finishes at 124 × 71 × 89 mm. It is not the same character form, design or instruction sequence as the standard 150-piece Gengar.
Before building: verify NBPM-007 on the package, open Kawada’s PDF, sort the purple elements by footprint and complete the first layer on a flat pad if one is available. Those four checks prevent most of the backtracking documented in the supplied builds.
NanoblockUS.com is an independent fan and informational resource dedicated to Nanoblock builders in the United States and beyond. We are not affiliated with Kawada Co., Ltd., the manufacturer of Nanoblock.. Our team is made up of hobbyists, collectors, and detail-obsessed builders who want to help you get the most out of these remarkable micro building sets.