The Snorlax Nanoblock most shoppers mean is Kawada’s Pokémon kit NBPM_012: a 220-piece, difficulty-level-three model that finishes at 64 × 64 × 44 mm (width × height × depth), or about 2.5 inches tall. It is a compact display build rather than a poseable figure. Its broad, symmetrical body makes the structure more approachable than many narrow-limbed character models, but the tiny dark-green pieces and isometric instruction views still demand careful sorting.
This guide helps you confirm the model, open Kawada’s official instructions, prepare the pieces and recover from the errors documented in recorded builds. It is best suited to Pokémon collectors and patient micro-block builders. Someone who dislikes very small parts, needs a toy for active play or wants a preassembled figure may prefer another option.
In this guide:
- Is this the right Snorlax set?
- Verified NBPM_012 specifications
- How to identify the correct model
- Official instructions
- A better way to sort the pieces
- What the diagrams do not make obvious
- Snorlax-specific troubleshooting
- Which build video should you use?
- Buying and authenticity checks
- Frequently asked questions
Is this the right Snorlax set?
NBPM_012 makes the most sense for a collector who wants a recognizable, palm-size Snorlax and does not mind working with bricks as small as 4 × 4 × 5 mm. Kawada rates it 3 on its difficulty scale. That places it above the simplest Pokémon characters, yet the body grows through repeated, mostly symmetrical layers instead of relying on long unsupported limbs.
The practical limitation is scale. Small differences between 1×3 and 1×4 pieces matter, while dark-green parts can look nearly identical in weak light. The finished model is also a display piece: it has no verified movable elements, and its pixel-like fangs, closed eyes and feet are formed from fixed bricks.
- Good fit: Pokémon collectors, builders comfortable with diagram-led assembly, and beginners who want an early challenge rather than the easiest possible kit.
- Consider another option: anyone with limited fine-motor control or vision, a child below the age guidance, or a buyer expecting a poseable play figure.
- Main advantages: recognizable silhouette, small display footprint, broad body and a clear support element documented beneath the finished model.
- Main drawbacks: tiny similar-looking pieces, dense isometric views and regional packaging or age-label differences that can confuse shoppers.
Verified NBPM_012 specifications
Kawada’s official NBPM_012 catalog page is the controlling source for the set’s identity and measurements. Retailer pages sometimes round the height to 2.5 inches or publish conflicting age labels, so use the official Japanese specifications below when comparing listings.
| Specification | Verified detail | What it means in practice |
|---|---|---|
| Official name | Pokémon: Kabigon | Kabigon is the Japanese product-page name for Snorlax; this is not a different build. |
| Item number | NBPM_012 | This is the most reliable identifier when packaging and listing titles differ. |
| Manufacturer and brand | Kawada; Nanoblock | Look for both the Nanoblock branding and the item number. |
| Series | Pokémon character collection / NBPM line | It is a single-character assembly kit, not a blind box. |
| Piece count | 220 | Recorded builds show leftover small pieces, so a few extras at the end do not by themselves prove an error. |
| Difficulty | Level 3 | The shape is manageable, but accurate layer offsets still matter. |
| Target age | 12+ in Japan | U.S. labels may differ; follow the age and safety information on the package you receive. |
| Finished size | 64 × 64 × 44 mm (W × H × D) | Approximately 2.52 inches wide and tall, with a depth of about 1.73 inches. |
| Package size | 105 × 180 × 13 mm (W × H × D) | The official Japanese package is a thin hanging pack rather than a large box. |
| Japanese release date | April 10, 2015 | Packaging may have changed across later production or regional distribution. |
| Instructions | Diagram sheet in documented unboxings; official PDF online | The digital copy is useful for zooming in or replacing a misplaced sheet. |
Kawada credits Pokémon, Nintendo, Creatures Inc. and GAME FREAK on the official page. The company also notes that release details are Japanese specifications and that licensing can affect regional sales.
How to identify the correct model
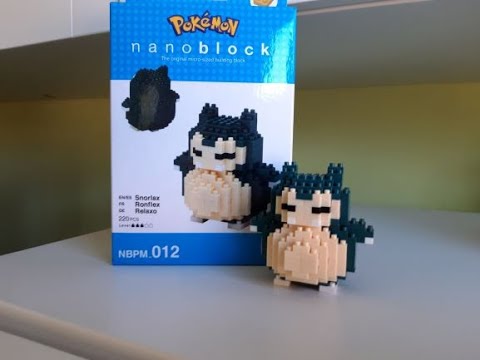
Start with NBPM_012. Listings may say Snorlax, Kabigon, Pokémon Series No. 12 or simply “Snorlax Nanoblock,” but the item number ties the package to Kawada’s 220-piece assembly kit. The Japanese JAN barcode associated with the product is 4972825149546.
Do not identify the kit by color or character name alone. Kawada also lists a Snorlax n-fig, a separate preassembled block-motif keychain figure. A product described as “assembly time zero,” a keychain or NFG-51 is not NBPM_012.
Use Kawada’s official instructions
Open the official NBPM_012 assembly instructions (PDF).
This guide is a practical companion to the manufacturer’s official instructions. It does not replace the official diagrams.
The PDF is the authoritative brick-by-brick sequence. Keep it open on a tablet or laptop so you can zoom into dark layers, then use the advice below to understand orientation, choose pieces and diagnose misalignment. The supplied Pinterest pin should not replace Kawada’s file: it is a third-party bookmark, and the right to republish the pinned instruction image is unclear.
If your paper sheet and an online tutorial appear to disagree, follow the official diagram first. A video can reveal depth and hand position, but camera angles, verbal slips and builder corrections are not revisions to Kawada’s sequence.
A better way to sort the pieces
The bags are not documented as a numbered build sequence. Opening them into one pile is possible, as several creators did, but it makes the dark-green shapes harder to distinguish. A contained, well-lit setup saves more time than it costs.
- Use a rimmed, light-colored surface. The rim catches tiny pieces; the contrast separates dark green, black and clear parts.
- Divide by color first. Make separate groups for dark green, cream, white, black and clear pieces.
- Split the two largest color groups by footprint. Keep 1×2, 1×3, 1×4, 2×2, 2×3, 2×4 and L-shaped pieces in separate shallow compartments.
- Pull only the pieces pictured for the current diagram group. Count them before pressing anything together.
- Leave one empty tray for leftovers. This prevents spare pieces from drifting back into unsorted stock and being mistaken for required parts.
Bright directional light is especially useful around the face. In storm20111’s build, white, cream and dark pieces needed closer checking, while Shy Gal’s documented review found the outlines between dark blocks difficult to read. A pair of blunt fine-point tweezers can help with selection, but firm placement is usually easier with fingers pressing close to the connection.
What the diagrams do not make obvious
The body is a stack of offset rings
The rounded silhouette forms through successive perimeter layers. That is helpful because left-right symmetry provides a built-in error check: after adding one side, compare the opposite side’s overhang and exposed studs. It is also risky because one misplaced brick can remain hidden until a later ring no longer closes correctly.
Choose a visible anchor—usually the center of the cream belly or a long dark-green brick—and count studs outward from it. Afternoons & Coffeespoons independently used this reference-point approach after finding the isometric view frustrating. Do not position a brick only by matching the outline of the completed layer.
Similar lengths cause real backtracking
In storm20111’s recorded build, a 1×3 was initially selected where a 1×4 was required. Darknido also corrected placements after moving to the wrong instruction area. Both examples point to the same rule: compare the brick’s stud count with the small parts callout before fitting it, even when the silhouette looks plausible.
Close the hollow body carefully
The torso and head contain open space while the upper layers are being added. A loose brick can drop inside and force you to shake the model or reopen completed layers. Keep unused parts away from the model and remove a fallen piece before sealing the next layer.
The clear brick is functional
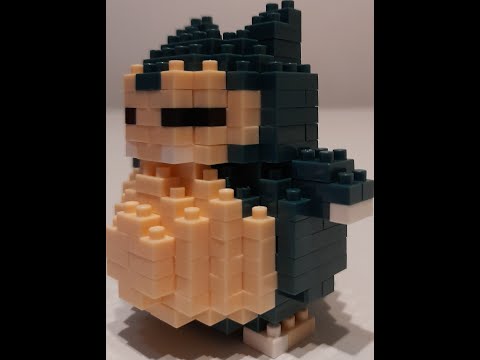
The transparent piece beneath the model is easy to overlook because it does not depict a visible part of Snorlax. Documented finished builds use it as a support, and Shy Gal’s review specifically credited it with helping the model stand. Install it in the manual’s position before deciding the model is unstable.
Snorlax-specific troubleshooting
| Problem | Likely cause | Practical fix |
|---|---|---|
| The next body layer will not close symmetrically | An earlier L-shaped or long brick is shifted by one stud | Stop before pressing harder. Return to the last complete ring, find the cream centerline and count exposed studs on both sides. |
| A selected piece looks right but leaves an odd gap | A 1×3 and 1×4, or another similar dark-green length, was confused | Match the stud count to the current diagram’s parts callout. Replace the piece before adding the layer above it. |
| The face does not line up | Black eye, white fang or cream face pieces are reversed or offset | Use strong light, orient Snorlax’s front exactly as shown and compare both sides before continuing onto the crown. |
| A brick falls inside the body | The model was open while loose parts were nearby | Retrieve it immediately by gently tilting the model over a tray. Avoid violent shaking, which can loosen the outer rings. |
| The finished model rocks or leans | The clear underside support is missing, misplaced or not fully seated | Compare the underside with the final official diagram and press the support evenly into position. |
| Several tiny pieces remain | They may be spares rather than omitted structural parts | If the model matches the final diagram and is stable, store the extras in a labeled bag instead of forcing them into the build. |
| A required part appears to be missing | The part may be in a bag seam, under another color group, inside the model or genuinely absent | Check packaging, tray edges, spare pieces and the hollow body. U.S. buyers can then review Bandai Namco’s replacement policy, keeping the receipt, package label and UPC available. |
Bandai Namco’s U.S./Canada replacement program includes Nanoblock, but support is conditional. Its policy requires evidence for eligible claims, limits some component requests and states that old collectibles or unavailable manufacturer stock may not be replaceable. Because NBPM_012 dates to 2015, contact support before assuming a replacement part can be supplied.
Which build video should you use?
None of the supplied runtimes should be treated as an average build time. Two videos cut between stages, one is a compressed speed build, and the longest includes substantial conversation. Choose by the kind of help you need instead.
Best for explained checkpoints: storm20111
storm20111’s NBPM_012 unbox and build groups pieces for each instruction section and discusses mistakes, including a misread brick length. It is the most useful supplied video for understanding why a layer went wrong, although the edits mean its runtime is not an assembly benchmark.
Best for continuous placement: darknido
darknido’s narrated build spends more time showing where pieces land on the preceding layer. The creator makes and corrects mistakes on camera, which is useful when diagnosing an offset but also reinforces why Kawada’s diagram remains authoritative.
Best for a quick preview: ACTION UNPACK
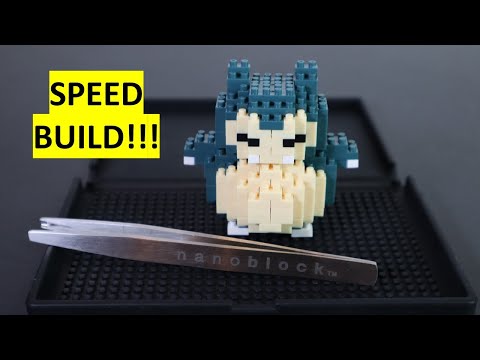
ACTION UNPACK’s 4:33 speed build quickly shows the model taking shape. It is useful before purchase or as a visual recap, not for following every placement and not as evidence that the kit can be completed in under five minutes.
Best for a slower build-along: Afternoons & Coffeespoons
Afternoons & Coffeespoons’ 1:07:30 recording shows the build from opened bags to the supported finished figure. The creator discusses sorting, diagram interpretation and symmetry, but much of the conversation is unrelated to Nanoblock, so it works better as a relaxed follow-along than a concise tutorial.
Buying and authenticity checks
NBPM_012 remains listed in Kawada’s catalog and Japanese official store, while U.S. marketplace stock depends on individual sellers. That supports treating the model as obtainable rather than confidently labeling every regional version “current” or “discontinued.” Prices and stock can change quickly, so compare the exact seller, shipment origin and return terms on the day you buy.
- Match the item number: NBPM_012 should appear on the package or listing photographs.
- Confirm the expected scale: Kawada lists 64 × 64 × 44 mm; a substantially larger product may be a different Snorlax item.
- Look for licensing and distributor information: U.S. authorized-distribution listings describe a Bandai Namco warning label. Imported Japanese packaging may differ, so the absence of a U.S. label is not by itself proof of a counterfeit.
- Inspect listing photos rather than trusting the title: “Snorlax blocks” can refer to compatible micro-brick products, finished figures or unrelated brands.
- Keep the receipt and packaging: they may be required if parts are missing or defective.
A very low price, missing manufacturer name or stock image alone cannot authenticate a set. The strongest practical combination is a visible NBPM_012 number, consistent package dimensions and branding, recognizable licensing text, a credible seller and buyer protection.
Frequently asked questions
How many pieces are in the Snorlax Nanoblock set?
Kawada lists 220 pieces for NBPM_012. Documented builders finished with several small pieces left over, so extras can be normal; compare the model with the final official diagram before assuming anything was skipped.
How difficult is Snorlax NBPM_012?
The official rating is level 3. The rounded, symmetrical body is relatively forgiving, but tiny dark pieces, one-stud offsets and the isometric diagrams make it more involved than a simple snap-together figure.
How long does it take to build?
There is no verified average. The supplied videos cannot establish one because they include edits, speed changes, narration, breaks or unrelated conversation. Reserve an unhurried session and stop at a completed diagram group if your concentration drops.
Does it include a display base?
Kawada’s official specification does not list a separate display baseplate. The documented model uses a small clear support brick underneath, which is part of the assembly rather than a broad presentation stand.
Are Snorlax and Kabigon different Nanoblock kits?
Not in this case. Kawada’s official page calls NBPM_012 “Pokémon: Kabigon,” while English-language sellers use Snorlax. The shared item number identifies the same model.
Is glue necessary?
No official source reviewed for this guide requires glue. Assemble the model dry first so an offset layer can be corrected. Adhesive makes disassembly difficult and may mark the bricks; a covered display case is a less permanent way to protect the finished model.
What should I do if the paper instructions are missing?
Use Kawada’s official NBPM_012 PDF. It is preferable to reposted scans because the manufacturer controls the file and can replace it if documentation changes.
Next step: confirm NBPM_012 on your package, open the official PDF on a zoomable screen, and sort the dark-green pieces by stud count before joining the first layer. That preparation addresses the most common source of backtracking without changing Kawada’s intended build.
NanoblockUS.com is an independent fan and informational resource dedicated to Nanoblock builders in the United States and beyond. We are not affiliated with Kawada Co., Ltd., the manufacturer of Nanoblock.. Our team is made up of hobbyists, collectors, and detail-obsessed builders who want to help you get the most out of these remarkable micro building sets.